The three starter cards in v0.7.1
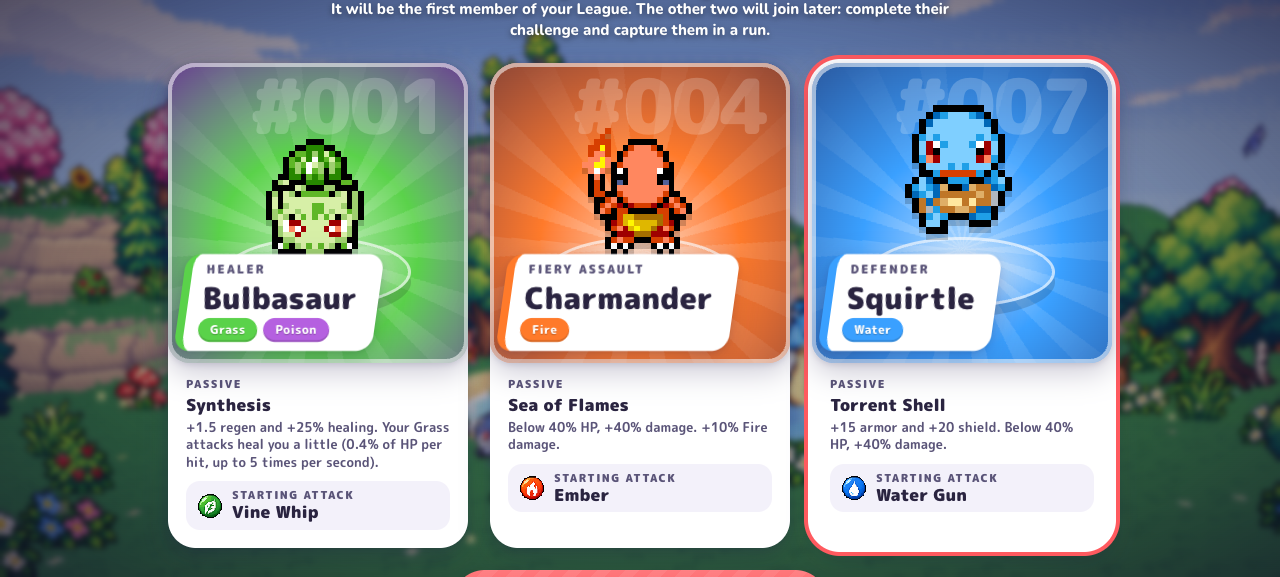
The new-profile screen offers these three partners. The menu says the other two can join later after their challenge is completed and they are captured in a run. Their unlocks were not completed during this menu inspection.
| Partner / first move | Passive shown in the menu |
|---|---|
| Bulbasaur · Vine Whip | Synthesis: +1.5 regen and +25% healing. Your Grass attacks heal you a little (0.4% of HP per hit, up to 5 times per second). |
| Charmander · Ember | Sea of Flames: Below 40% HP, +40% damage. +10% Fire damage. |
| Squirtle · Water Gun | Torrent Shell: +15 armor and +20 shield. Below 40% HP, +40% damage. |
Choose around the mechanic you want to use
These are suggestions based on the card text, not a full-run ranking. Keep the same mode and Lab setup when you compare partners.
| If you want to explore… | A starting point | What to keep in mind |
|---|---|---|
| Healing and recovery | Bulbasaur | Grass-hit healing has a stated limit of five triggers per second. Check which moves are Grass. |
| Fire attacks and a low-HP damage bonus | Charmander | The +40% damage condition requires HP below 40%; it is not always active. |
| Extra defensive resources | Squirtle | Armor and shield give a different starting setup, but do not guarantee a clear. Its damage bonus also requires HP below 40%. |
Make your comparison useful
Before deciding that a starter is stronger, repeat a comparable task. A short attempt with different settings, different choices and a different endpoint cannot isolate the partner’s contribution. Write down what you actually want to compare: reaching a particular point, avoiding early damage or feeling comfortable with the controls.
Keep the mode, available difficulty, region and major permanent upgrades as similar as practical. Record several ordinary attempts, including unsuccessful ones. If a partner simply feels easier for you to control, that is a valid personal reason to use it even when it does not prove a wider ranking.
- Compare the whole starting kit, not only one damage number.
- Read the move’s own labels before choosing a matching bonus.
- Keep a note of the game version so a later balance change does not silently change the comparison.
Check the kit before your next run
Use the move-learning guide to find the detailed partner panel. It helps you separate an attack’s availability from the chance of receiving an offer. The build-planning guide provides a repeatable way to record choices once you have a favorite starter.
There is no measured full-run clear-rate table behind this page. Its recommendation is to begin with the role that interests you, then judge it against the problem your own runs reveal.
Which PokeBonk starter fits your next goal?
Choose your PokeBonk starter by the mechanic you want to understand. Bulbasaur introduces recovery, Charmander rewards attention to Fire attacks and low HP, and Squirtle offers a defensive opening. Before searching for the best PokeBonk starter, decide what you want to practice. Read that partner’s move panel, then compare choices that support the attacks you actually expect to use.
Frequently asked questions
Which PokeBonk starter is best for beginners?
Compare the passive you want to learn: Bulbasaur offers healing, Charmander has Fire and low-HP mechanics, and Squirtle begins with armor and shield. This guide has no measured universal winner.
Does picking one starter permanently lock out the others?
The starter screen says the other two join later after you complete their challenge and capture them in a run. This guide verified the wording, not the full unlock sequence.
Sources & research notes
The sources below distinguish our menu observations, original announcements, community reports and browser documentation. Check the version and scope before applying a value to your run.
- PokeBonk v0.7.1 — directly observed English menusOriginal project
Fresh Guest, zero completed runs and no purchases. Read starter passives, default keys, touch settings, 19 first-level Lab prices, the visible item pool, Squirtle’s move panel and mode preparation screens. Screenshots appear alongside the relevant guide sections. Combat outcomes, later-level prices and real-device touch performance were not tested.